
ダボはぎをかんたんに、斜めも工夫して正確に


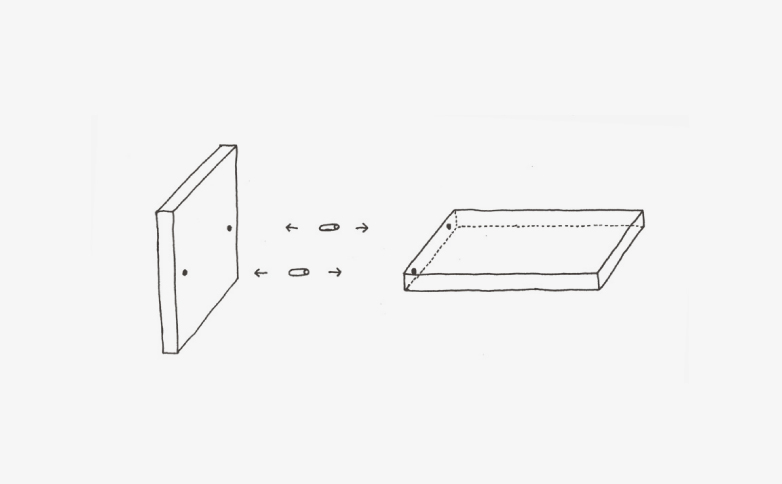
ダボはぎとは、ビスの頭が見えないように内側で止める方法です。 ビスを使わないので美しくなりますし、強度もあります。 今回このダボはぎをできるだけ簡単におこなう方法をご紹介します。 ダボはぎは、穴と穴を正確に開ける必要があるので、便利な工具がないと難しい接続方法の1つです。 まず90度に穴を開けるのに苦労します。 計測用の便利工具としては”木工測定ゲージ”や”ダボガイド”があるので検索してみてください。

Tips for easy dowel joining


Dovetailing" is a joinery technique where pieces of wood are joined together by inserting wooden pegs into precisely drilled holes. This method creates a strong, invisible joint, resulting in a clean and beautiful finish. While it requires accurate drilling, there are tools available to simplify the process, such as woodworking gauges and dowel jigs.

満足度  | 5/5   |
|---|---|
難易度  | 少し難しい   |
予算  | ¥500~   |
材料  | 木ダボ   |
道具  | 電動ドライバー, ドリルストッパー, 木工用ボンド, ダボガイドや木工測定ゲージ, 差し金   |

ドリルガイドという直角に穴をあけるための治具があるので、それをつかうことで確実に穴を開けることができるようになります。 ダボの穴あけをおこなう場合は、そんなに高くないので1つ持っておくことをおすすめします。 斜めのときは、余った角材をつかって、できるだけ正確に開けられるように治具をつくって対応しています。 必要なのはドリルストッパーです。 ストッパーは、穴が必要以上に深く開かないようにするための道具です。

I use a drill guide to ensure that my holes are drilled at a perfect 90-degree angle. This tool is invaluable when drilling for dowels, and it's a relatively inexpensive investment. For angled holes, I've found that creating a simple jig from scrap wood provides the accuracy I need. Additionally, a drill stop is crucial to prevent drilling too far into the material.

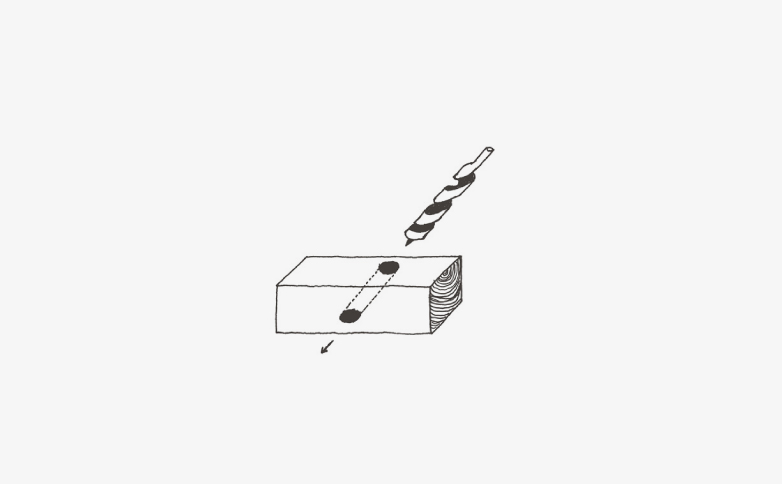

上の図のように、角材をつかいます。 ガイドの穴は後ろと前から穴を開けるようにして、できるだけ正確な角度で開けるようにします。 穴を開ける前にキリで軽く穴を開けてから掘るようにしてください。 ストッパーは、深く掘り過ぎないようにセットしておきます。 ダボ穴を開けた板がたくさん必要な場合、普通にやっていてはやってられません。 たとえば、1つの板に左右2つづつ穴が必要な場合、棚全体で穴の数が100カ所以上になる場合があります。

I'll use a square timber as shown in the diagram. To ensure precise angles, I'll drill the guide holes from both the front and back. Before drilling, I'll use an awl to create a small pilot hole. I'll also set a depth stop to prevent over-drilling. Drilling dozens of dowel holes for many boards would be time-consuming. For example, if each board needs two holes on both sides, I could end up drilling over 100 holes for an entire shelf.

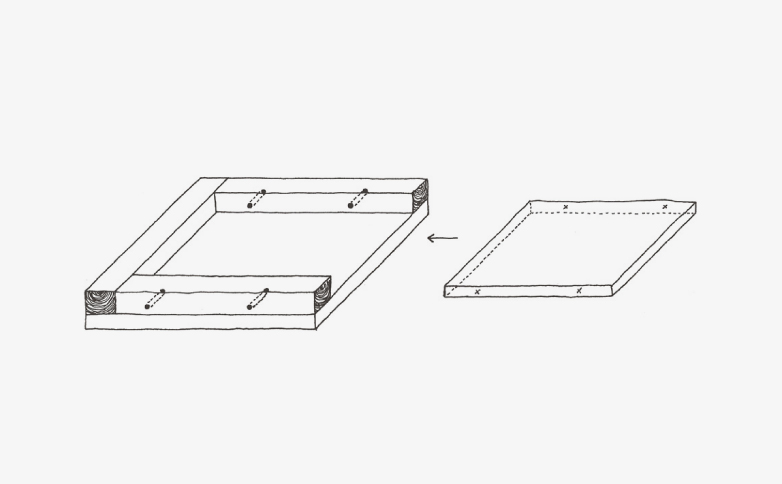

こういう場合は以下の方法でやってみると早かったです。 棚板と同じサイズでコーナークランプでコの字の木枠をつくり、棚板を差し込めるようにします。 このとき反りのない木材をコーナークランプでガッチリ固定します。 木枠の左右には、棚板の穴を開ける場所と同じ場所に穴を開けておきます。 木枠と棚板がずれずにガッシリ差し込んでいることを確認したら、ガイドの穴を使って穴を開けていきます。 開けたら棚板を取り出します。

If you want to do it quickly, I recommend the following method. Create a C-shaped wooden frame using corner clamps and a board the same size as your shelf. Make sure to use a straight board and clamp it tightly. Drill holes in the frame, aligning them with where you want the holes in the shelf. Insert the shelf into the frame to ensure a tight fit, then use the guide holes to drill into the shelf. Remove the shelf when you're finished.
